25 Summer Orange Nail Design Ideas
When the days stretch longer and the sun beats brighter, it’s time for your manicure to reflect that vibrant energy. Orange is the color of heat, joy, and bold self-expression — making it perfect for summer. Whether you’re looking for playful designs, tropical vibes, elegant upgrades, or artistic flair, these orange nail ideas offer the perfect inspiration to brighten your season and complement your style.
A Playful Twist on Short Nails
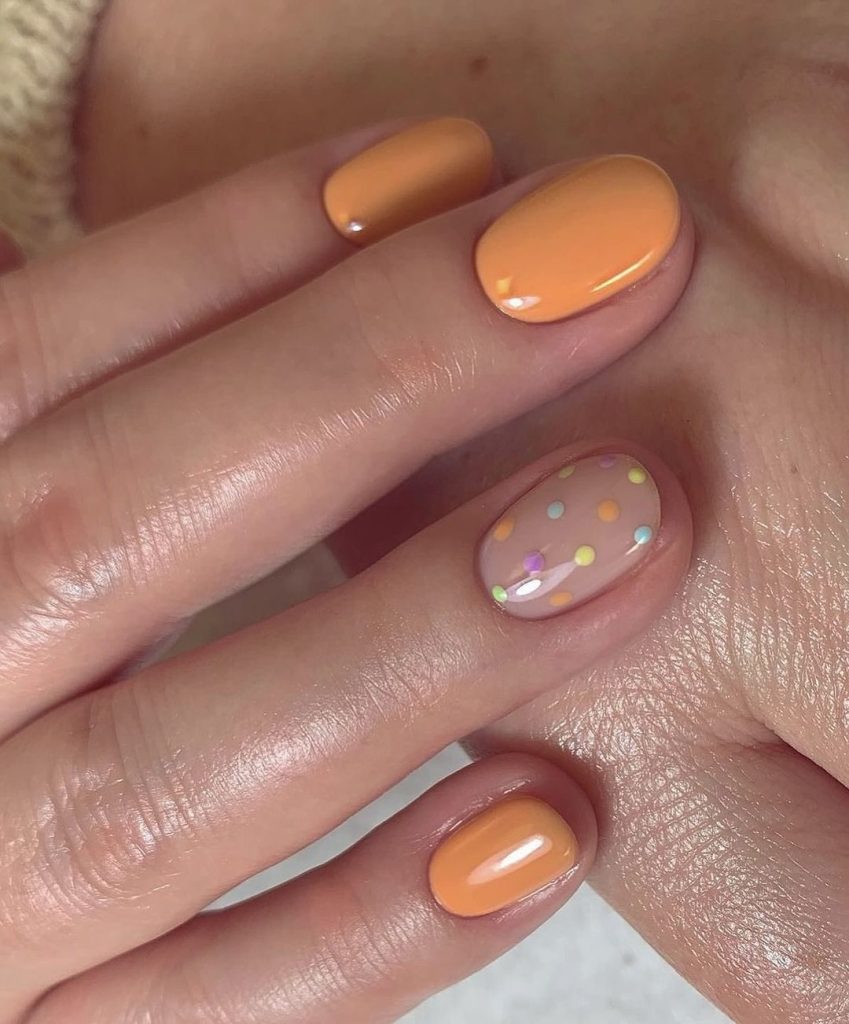
Short nails become a joyful canvas when creamy orange polish meets pastel polka dots. The result? A design that’s flirty, fun, and packed with summer personality. The balance of solid color and delicate accents celebrates both creativity and minimalism.
- A base coat to prep
- A bright orange polish that screams summer
- Pastel polishes for dotting
- A dotting tool for precision
- A glossy top coat for shine
Start with a quality base coat to protect and smooth the nail surface. Use a rich orange polish for a strong foundation—aim for a one-coat application if it’s highly pigmented. With your dotting tool, create pastel polka dots across selected nails. You can vary the pattern or placement for a more whimsical feel. Seal the entire design with a glossy top coat so it stays flawless throughout beach days and summer outings.
A Splash of Neon on Long Nails
Long nails are made for bold statements, and nothing shouts summer louder than neon. This design combines electric coral orange with vivid green accents in a look that channels tropical sunsets and wild palm leaves — lively, exotic, and fashionable.
- A neon coral polish
- Some green polish for accenting
- A thin brush for detailed work
- A matte top coat to finish it off
Buff and clean your nails, then apply the neon coral base color in even coats. Let each layer dry fully for the best vibrancy. With a thin brush, freehand green details — think tropical leaves, swirls, or graphic lines. The final matte top coat gives the design an edgy, art-forward look while making the colors pop even more.
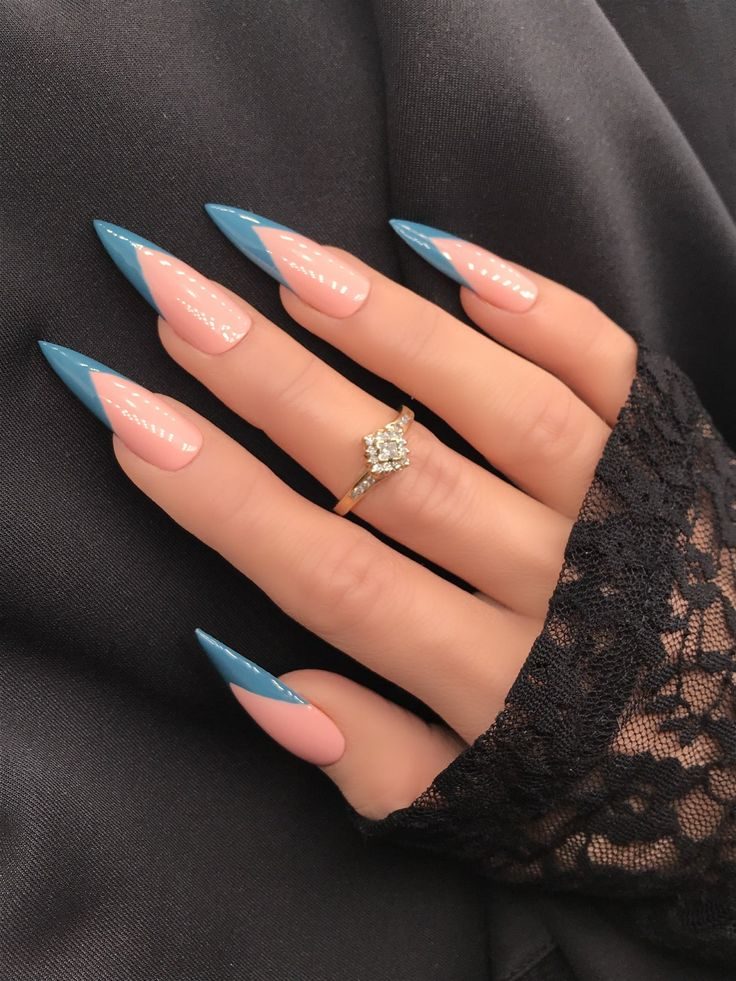
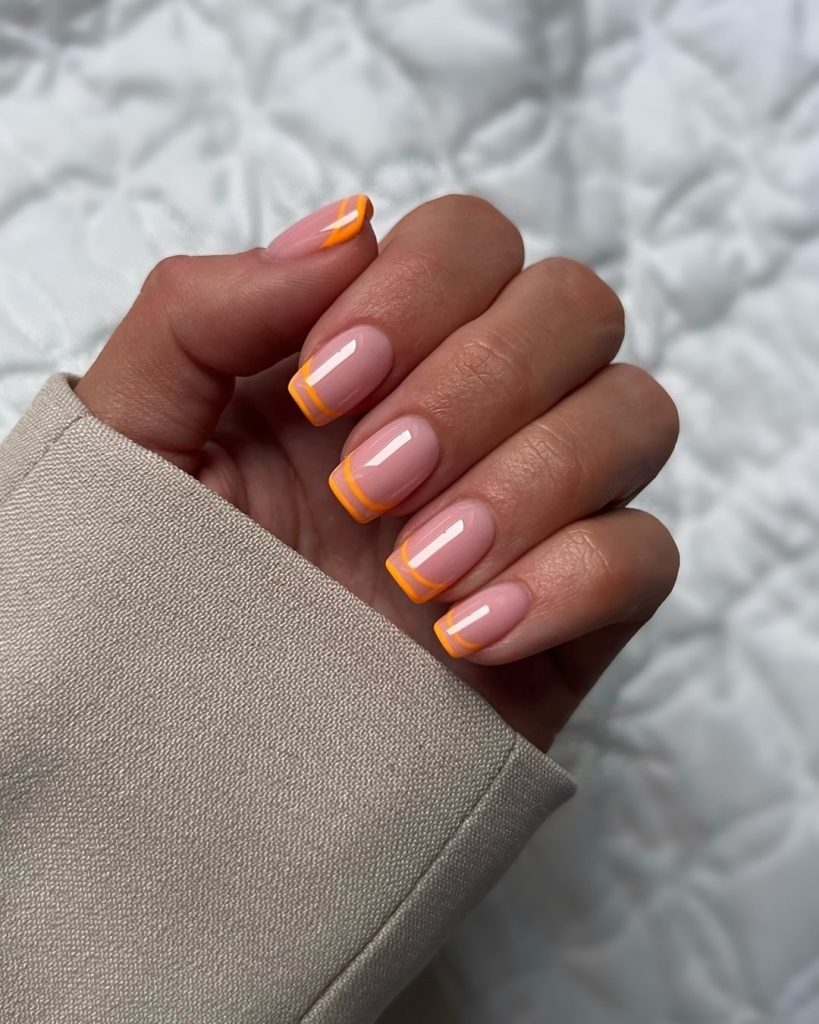
Classic Elegance with a Citrus Twist
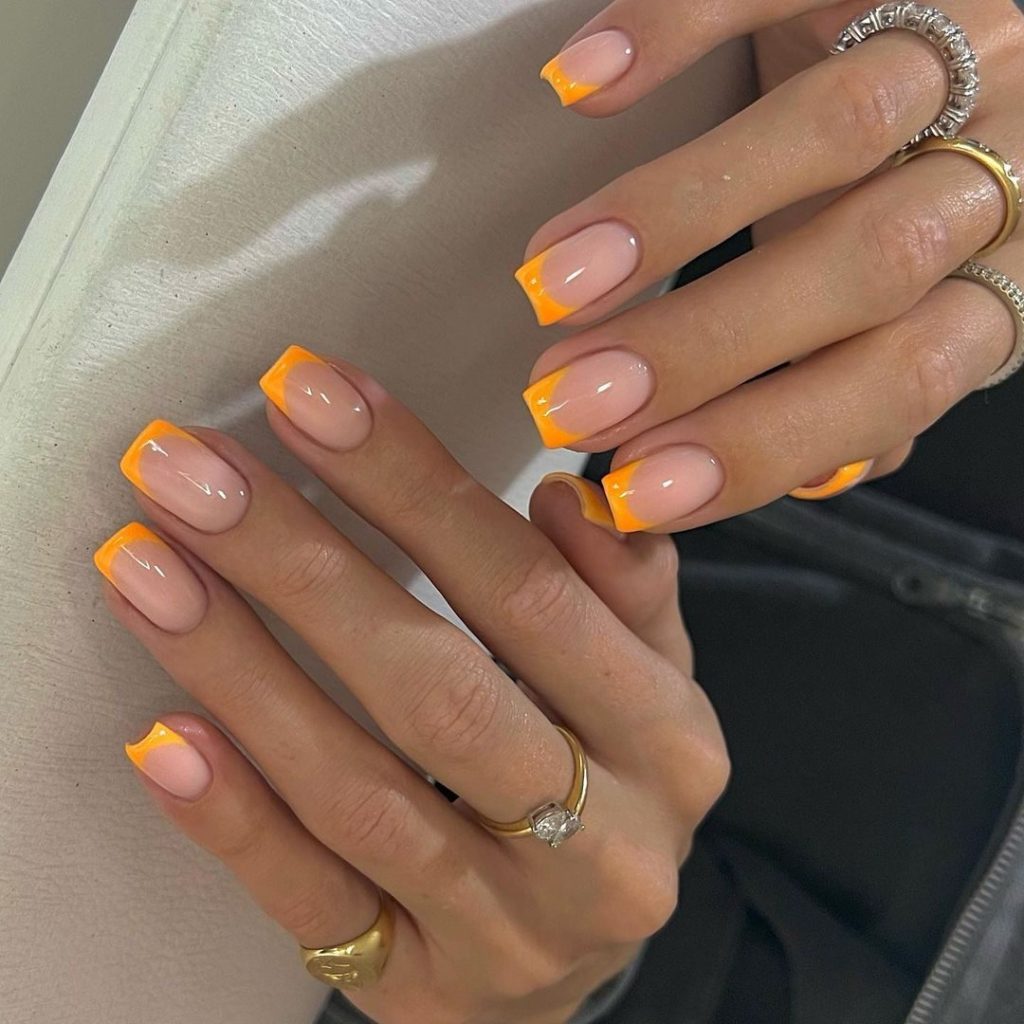
Think French manicure, but refreshed with a zesty orange twist. This classy yet spirited look is perfect for work meetings or poolside lounging — versatile and radiant.
- A sheer pink base polish for a natural look
- Bright orange polish for tips
- Thin striping tape for accuracy
- Fast-drying top coat for perfect finish
Begin by applying two thin layers of sheer pink to enhance your natural nail tone. Once dry, apply striping tape across the nail tip to mark your French edge. Carefully paint orange polish above the tape and peel it away while the polish is still wet. This results in a clean, vivid citrus tip. Finish with a fast-drying top coat for a glass-like finish.
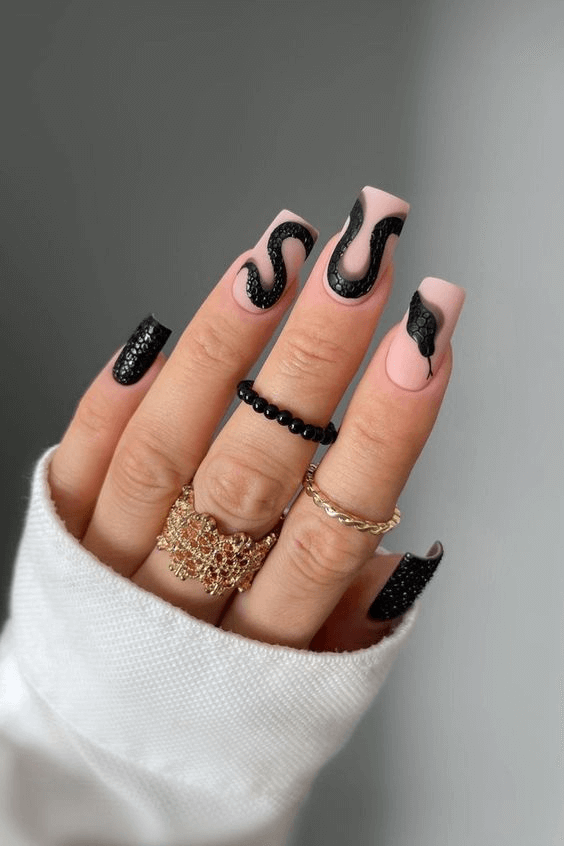
Bright Orange: The Neon Glow
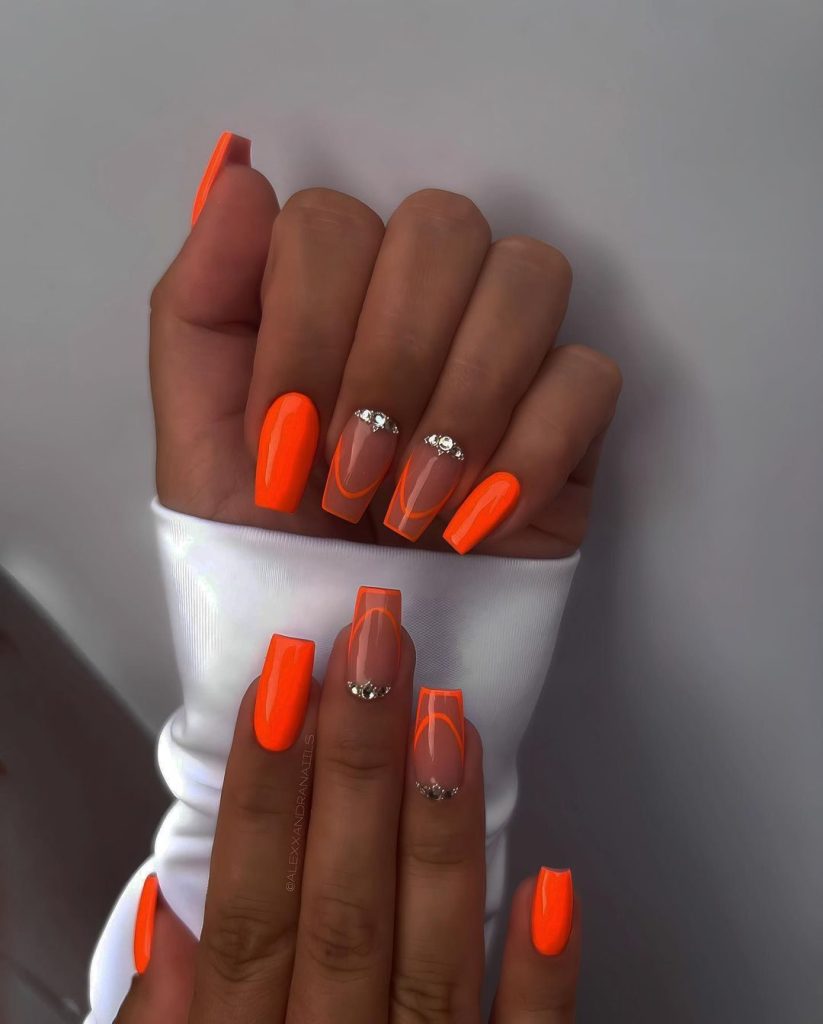
This is orange amplified — a neon polish bursting with brightness and refined with silver lines and rhinestones. Perfect for party nights or just radiating confidence.
- High-voltage neon orange gel polish
- Sleek silver striping tape
- Glamorous rhinestones
- UV or LED lamp (for curing gel polish)
- Shiny topcoat (to seal in shine)
Prep your nails and shape them well before applying a coat of neon orange gel polish. Cure under a UV or LED lamp. Apply striping tape in clean, straight lines and place rhinestones with a small tool or tweezers. Finish with a shiny top coat to secure the embellishments and keep the neon brilliance lasting longer.
Sunset Ombre: The Gradient of Dreams
Mimicking a summer sunset, this nail design blends shades from coral to vibrant orange, fading together in a soft, beautiful transition.
- Several orange varnishes from light to dark
- A makeup sponge (to create the gradient)
- Top coat (for smooth transition)
- Nail polish remover + clean-up brush for excesses
Begin with a base of light orange. On a makeup sponge, paint horizontal stripes of your gradient colors from darkest at the top to lightest at the bottom. Dab it on your nail repeatedly until the shades blend seamlessly. Use a clean-up brush to remove any residue around the cuticles. Seal everything with a smooth top coat to create that dreamy fade.
Geometric Chic: Orange and Art
Angular, structured, and eye-catching, this nail art plays with bold lines and negative space. It’s the perfect balance of creative design and modern edge.
- A bottom coat to shield natural nails
- Orange polish for base color
- Tape or nail stencils for geometrical accuracy
- A detail brush for freehand drawing
- A top coat to give final touch
Apply your base coat and let it dry. Use striping tape or stencils to mark geometric shapes—triangles, lines, or overlapping angles. Fill in selected spaces with orange polish, keeping the design crisp and clean. Use a detail brush for intricate areas. Finish with a top coat for a smooth, polished look.
The Canvas of Summer: Marbled Orange Elegance
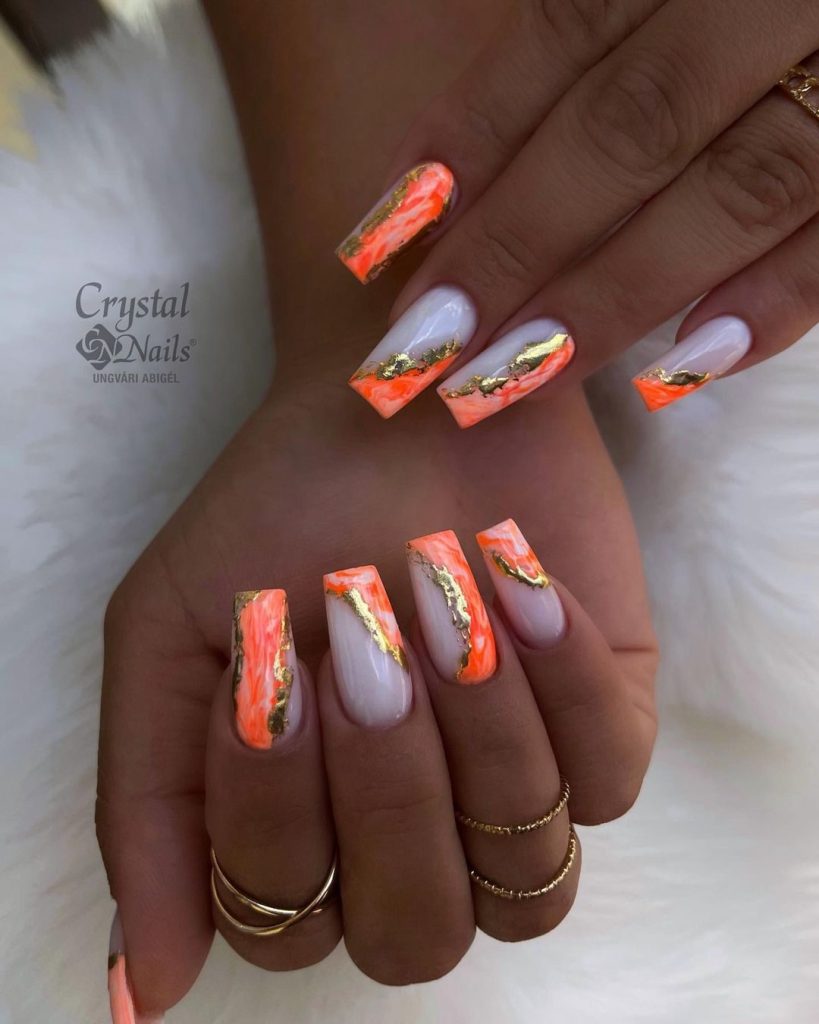
This marbled look merges bold orange swirls over a white background with a touch of gold foil for a luxurious summer finish.
- Gel polish in white for the base
- Acrylic paint in orange and gold for marbling
- Gold leaf for embellishing
- Dotting tools and fine brushes for detailing
- Non-wipe glossy top coat for long-lasting shine
Apply and cure your white base coat. Use a dotting tool to drop orange paint onto the nail, then swirl it into a marbled pattern using a fine brush. Add tiny pieces of gold leaf in random spots for depth and shimmer. Lock in the design with a glossy non-wipe top coat.
Coral French Tips: A Modern Take on a Classic
A sleek French manicure that uses coral instead of white adds a modern, cheerful twist without overwhelming your look.
- A sheer pink polish (for the base coat)
- Bright coral polish (to create an accent)
- Protective clear coat (for shine and durability)
- Thin strips or stencils (for clean lines)
Paint two coats of sheer pink for the base and let it dry. Use striping tape to define the tips, then apply coral polish to the tip area. Remove the tape carefully to reveal a sharp edge. Finish with a clear protective top coat for a flawless blend.
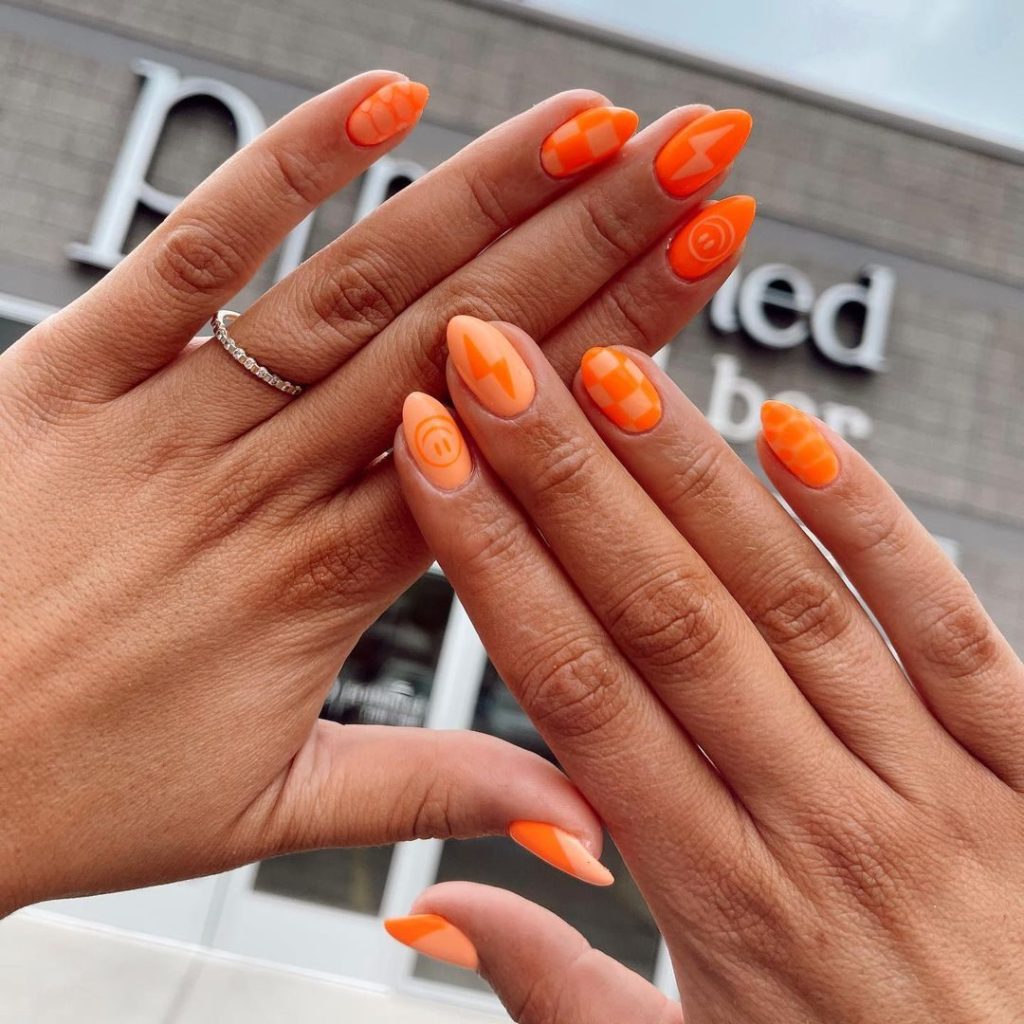
Citrus Delight: Bold and Playful
This design is full of energy — bright orange base with whimsical white patterns like stripes, checks, or abstract shapes.
- Bright orange nail polish
- White nail polish
- Fine detail brush
- Glossy or matte top coat
Paint your nails orange and let them dry. Use a fine brush dipped in white polish to draw fun, playful patterns. You can mix different shapes on each nail or go for symmetry. A top coat will secure the look and add your choice of finish.
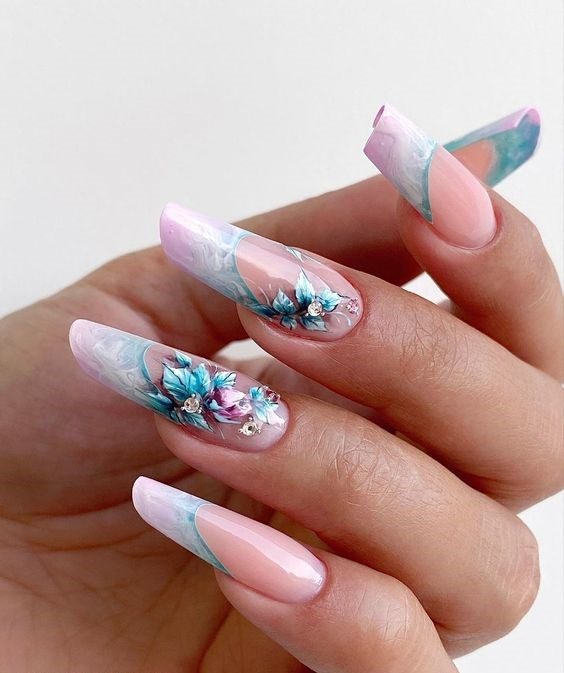
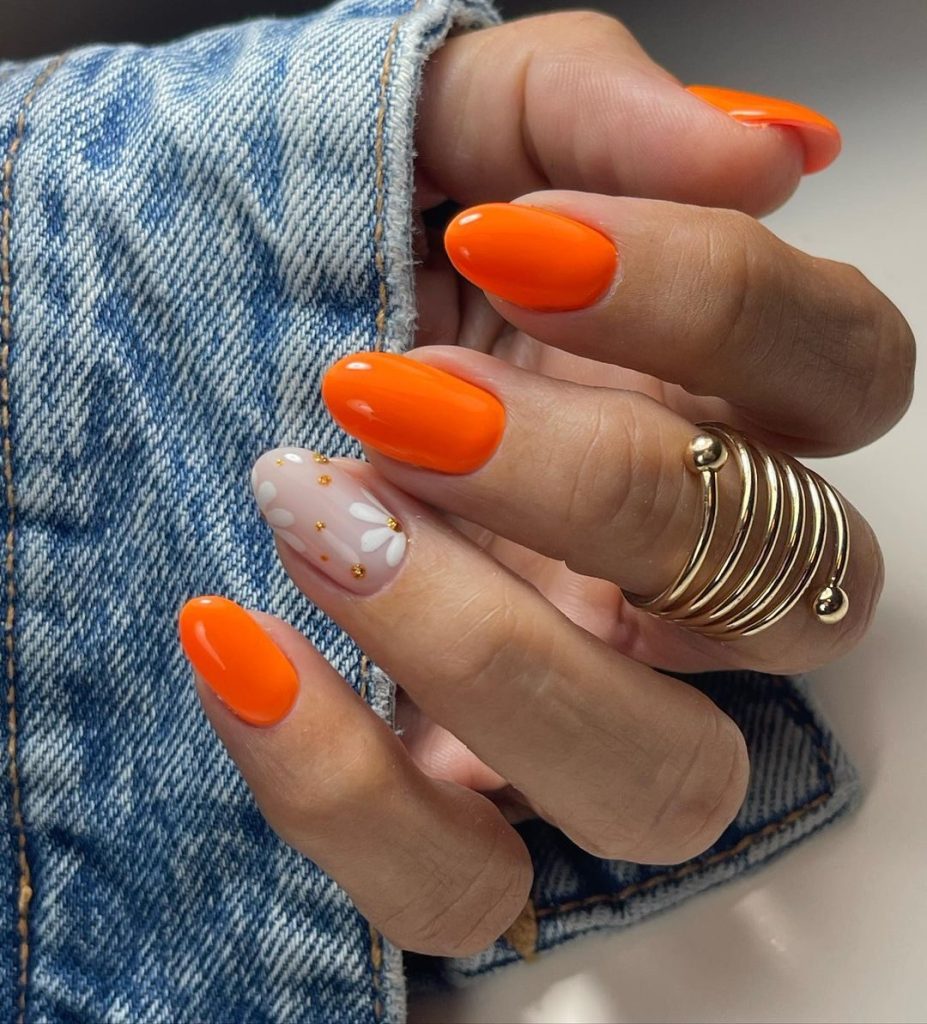
Festival of Colors: Floral and Blue Accents
Celebrate summer’s bloom with this floral orange-and-blue fusion on a soft pink backdrop.
- Light pink gel polish for a soft background
- Acrylic paints in orange and blue for your flowers
- Fine-tipped brushes to paint delicate petals
- A shiny top coat to protect your design
Start with your pink base, then use a small brush to hand-paint orange and blue flowers. Vary petal shapes and sizes for a natural look. Add subtle white accents for realism. Seal it with a shiny top coat.
Sunset Glitter Stripes: Glow with Elegance
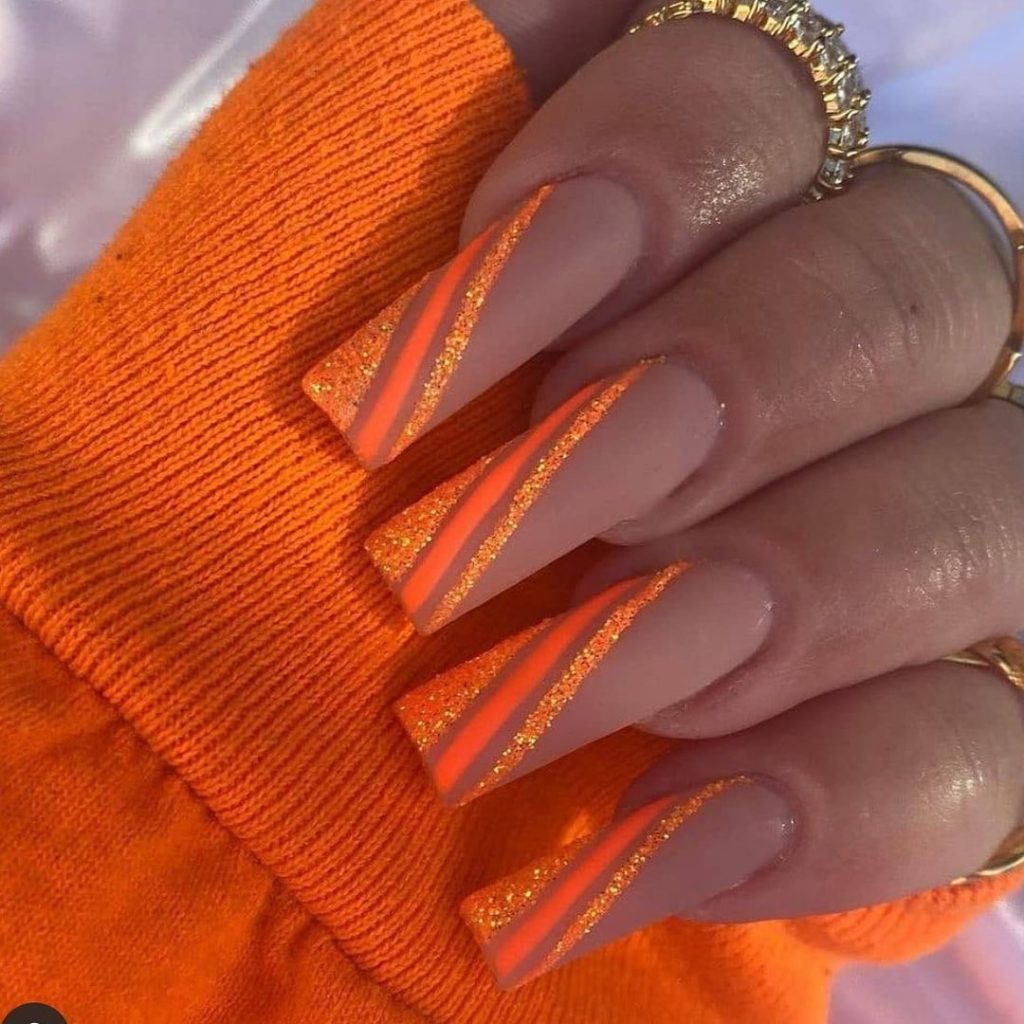
This design captures the glint of a summer sunset with orange glitter stripes layered over a peach base, finished with a soft matte glow.
- Warm base with peach gel polish
- Striking stripes made from orange glitter
- Perfectly straight lines thanks to striping tape
- A contrasting finish achieved by using matte top coat
Apply one or two coats of peach polish and allow it to dry. Place striping tape across the nail to form horizontal or diagonal lines. Brush on orange glitter polish between the tape lines, then peel away the tape to reveal crisp glitter edges. Finish with a matte top coat to balance sparkle with sophistication.
Abstract Orange Waves: The Bold Swirl
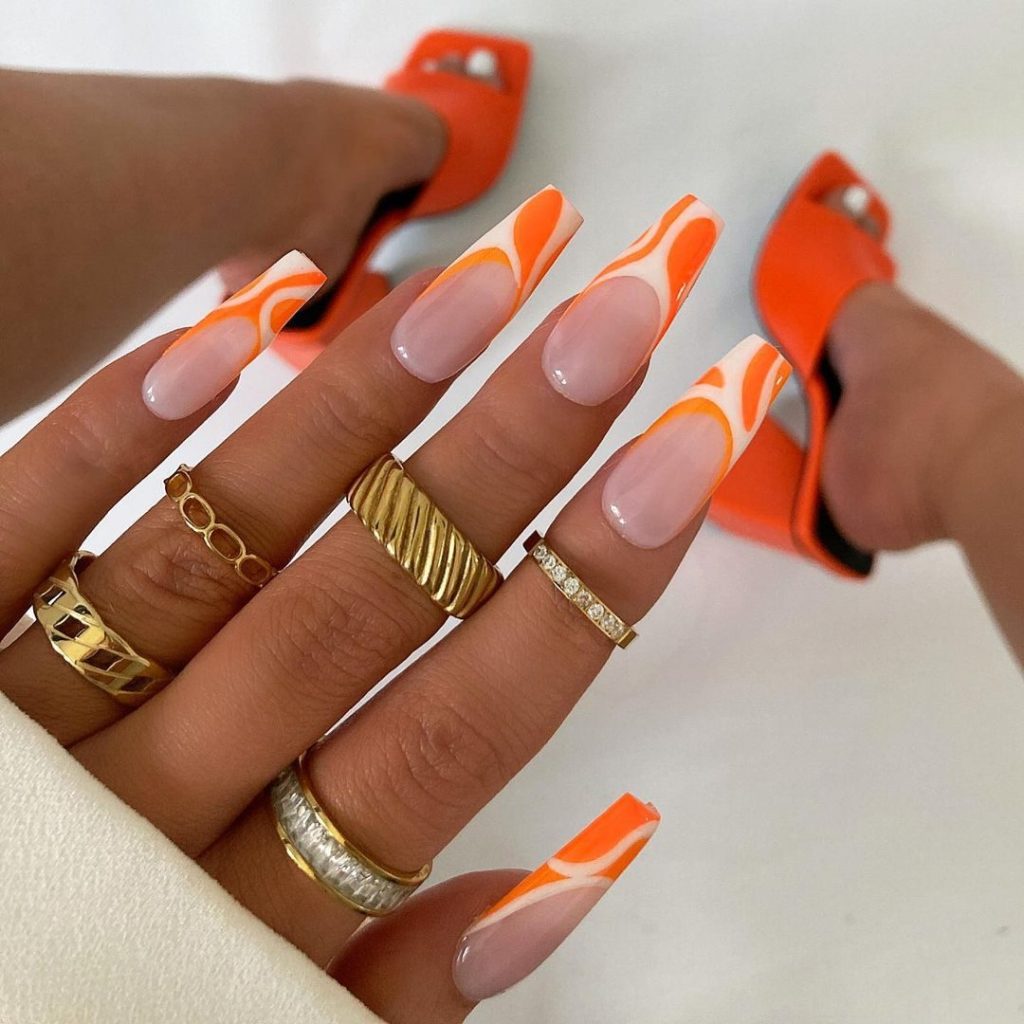
With a nude base and free-flowing orange curves, this design evokes movement, spontaneity, and summer charm.
- A base coat to give you a neutral look
- Vibrant orange polish for the waves
- A fine brush for painting swirls
- Glossy top coat for a glassy finish
Start with a nude or clear base. Once dry, use your fine brush to paint curved, swirling lines in orange, letting them stretch across each nail like a breeze. Let it dry, then lock it in with a glossy finish to give the design depth and shine.
Whimsical Wonderland: Butterflies and Blooms
This garden-inspired manicure captures butterflies fluttering across blooming flowers in soft pastels and bright orange.
- Sheer nude polish as a barely-there base
- Polishes in pastel, white, and orange
- Dotting tools and fine brushes
- Glossy top coat
Paint your base, then create flowers using dots for petals and lines for detail. Draw butterflies with pastel wings edged in orange, using a fine brush for wing shapes and symmetry. Finish with a glossy top coat for a radiant, polished look.
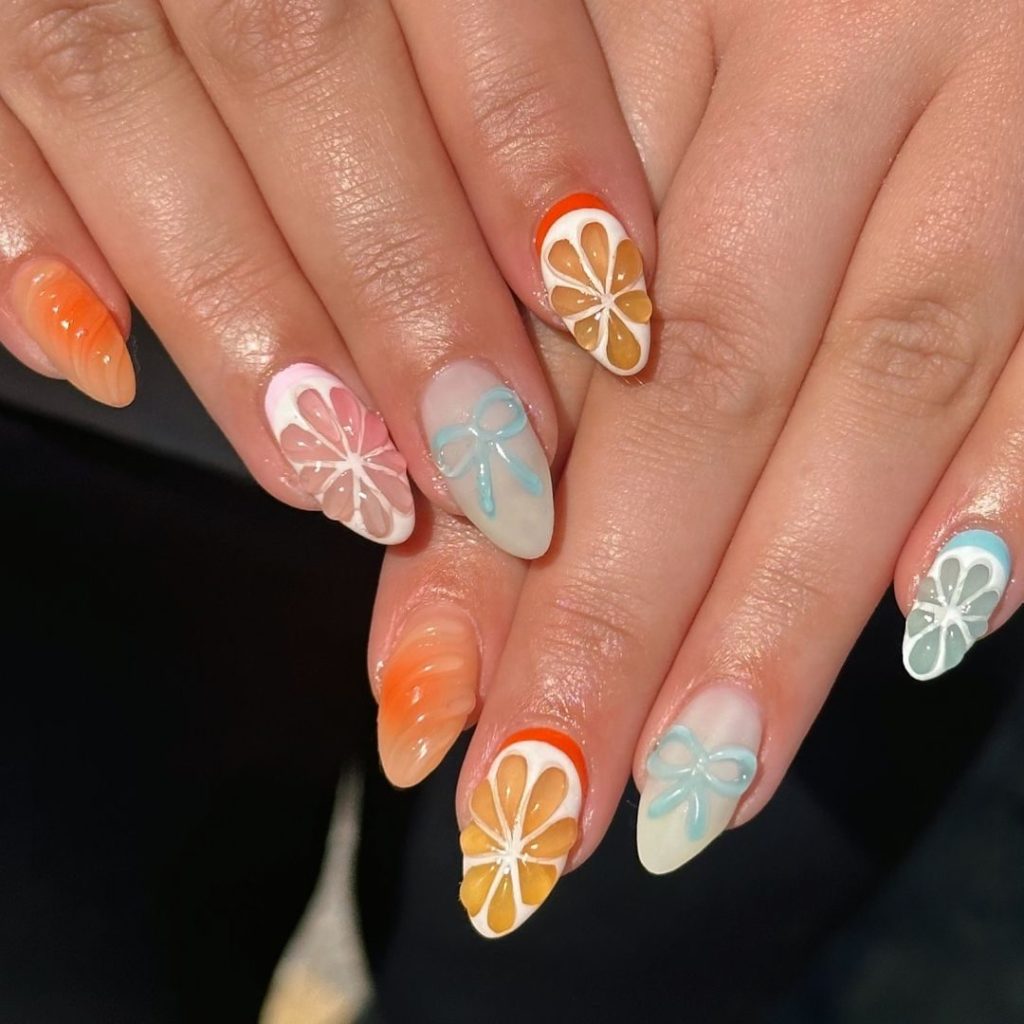
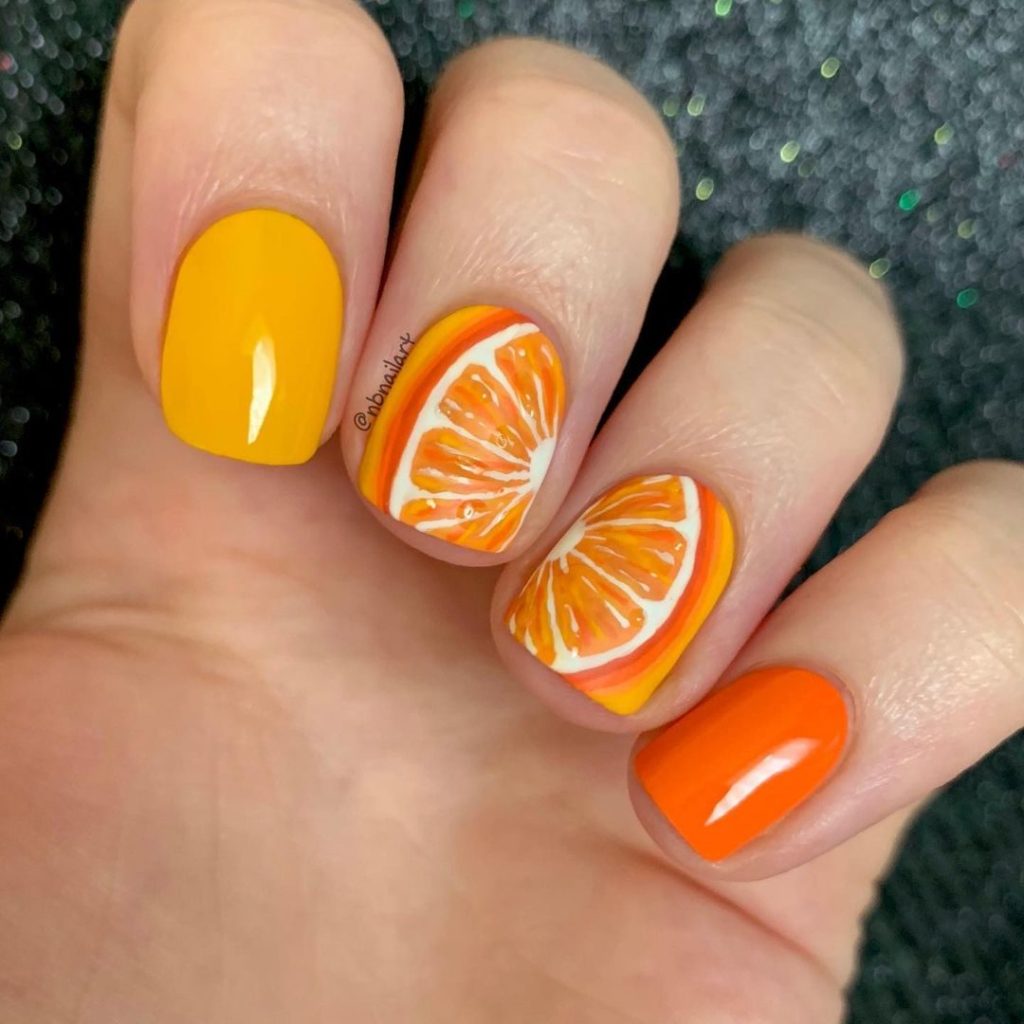
Summer Citrus: Fresh and Zesty
Bring the juiciness of real citrus to your nails with orange slices painted over a bright yellow background.
- Bright yellow nail polish for the sunny base
- Orange polish to create citrus wedges
- White and light orange polishes for fruit detail
- Glossy top coat for shine
Start with yellow as your base. Using orange and white, draw half-circle wedges and segments with a small brush. Add white lines for the juicy segments. Finish with a glossy top coat to make it look fresh and lifelike.
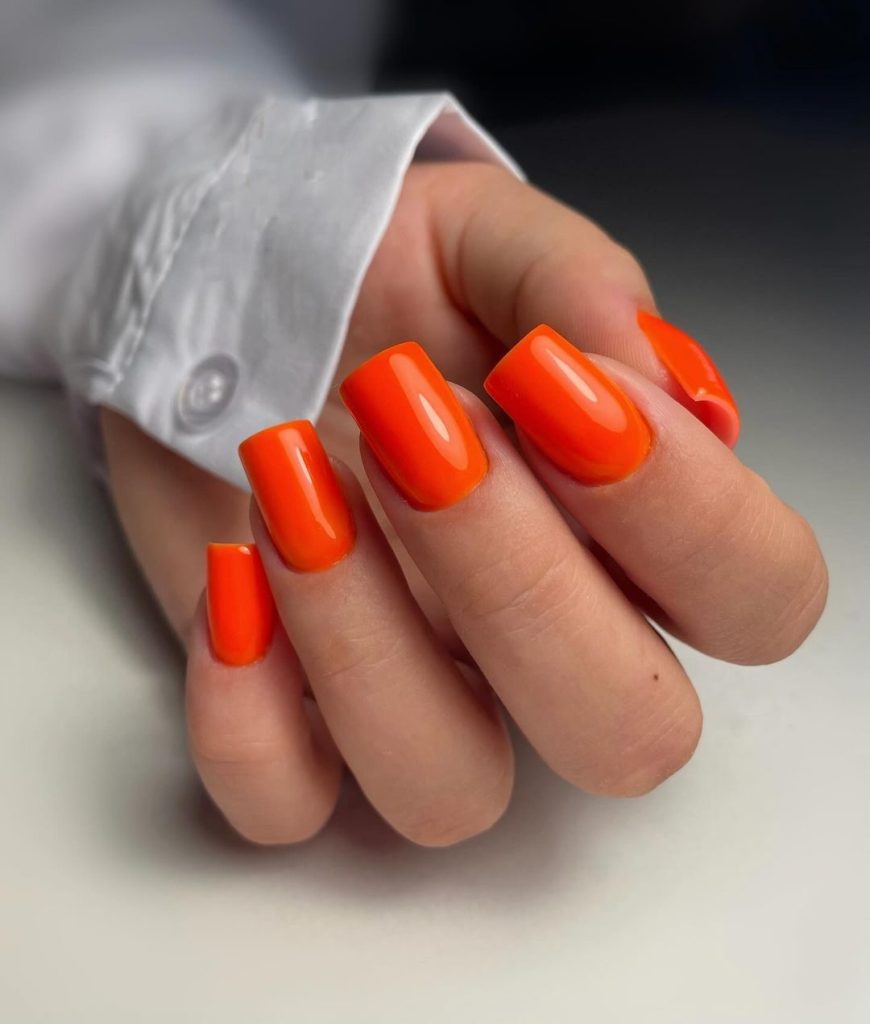
The Classic: Bold Orange Full Cover
For those who believe in color power, a full-coverage orange manicure makes a loud, proud statement that’s hard to ignore.
- Full-coverage deep orange polish
- Base coat for protection and smoothing
- Glossy topcoat for extra shine
Apply a base coat, then two even coats of deep orange polish. Let each coat dry thoroughly. Finish with a high-gloss topcoat for an intense, summery shine that speaks for itself.
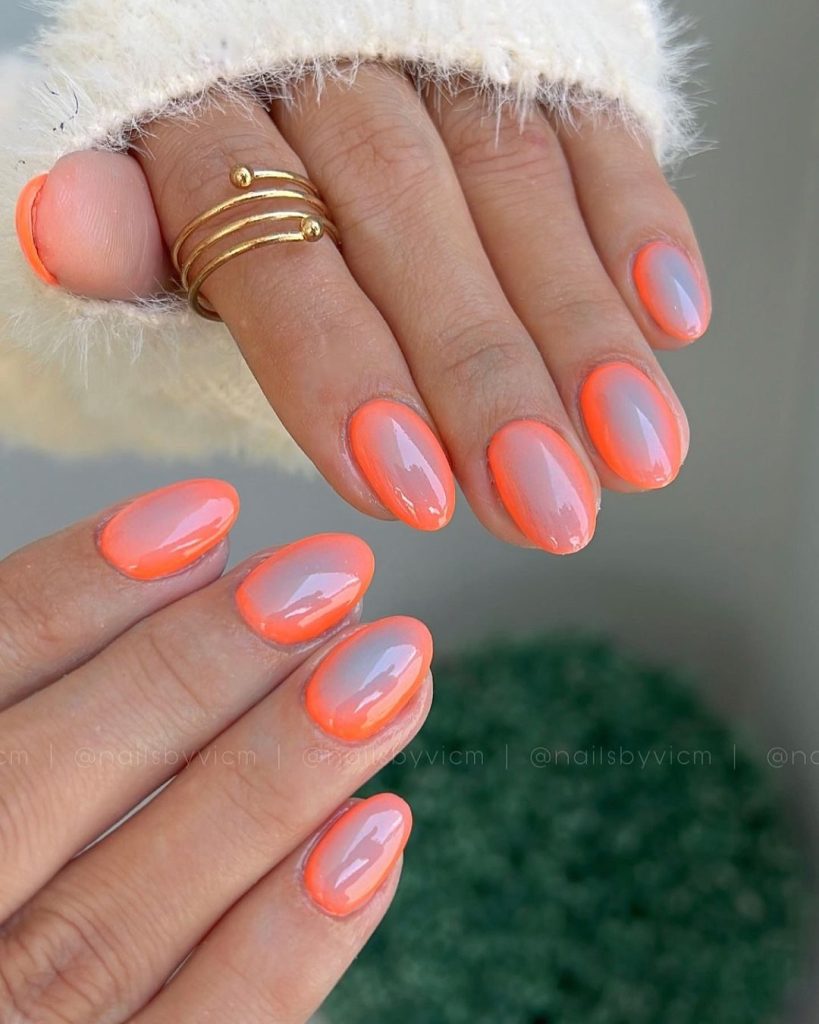
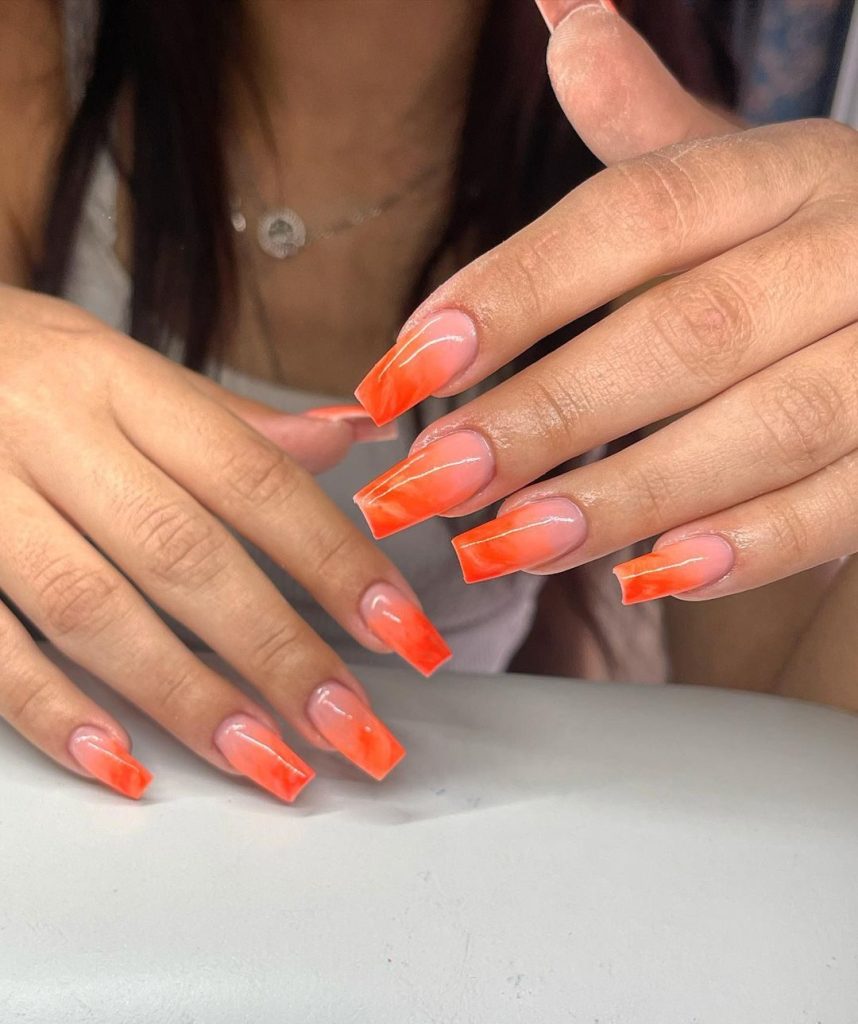
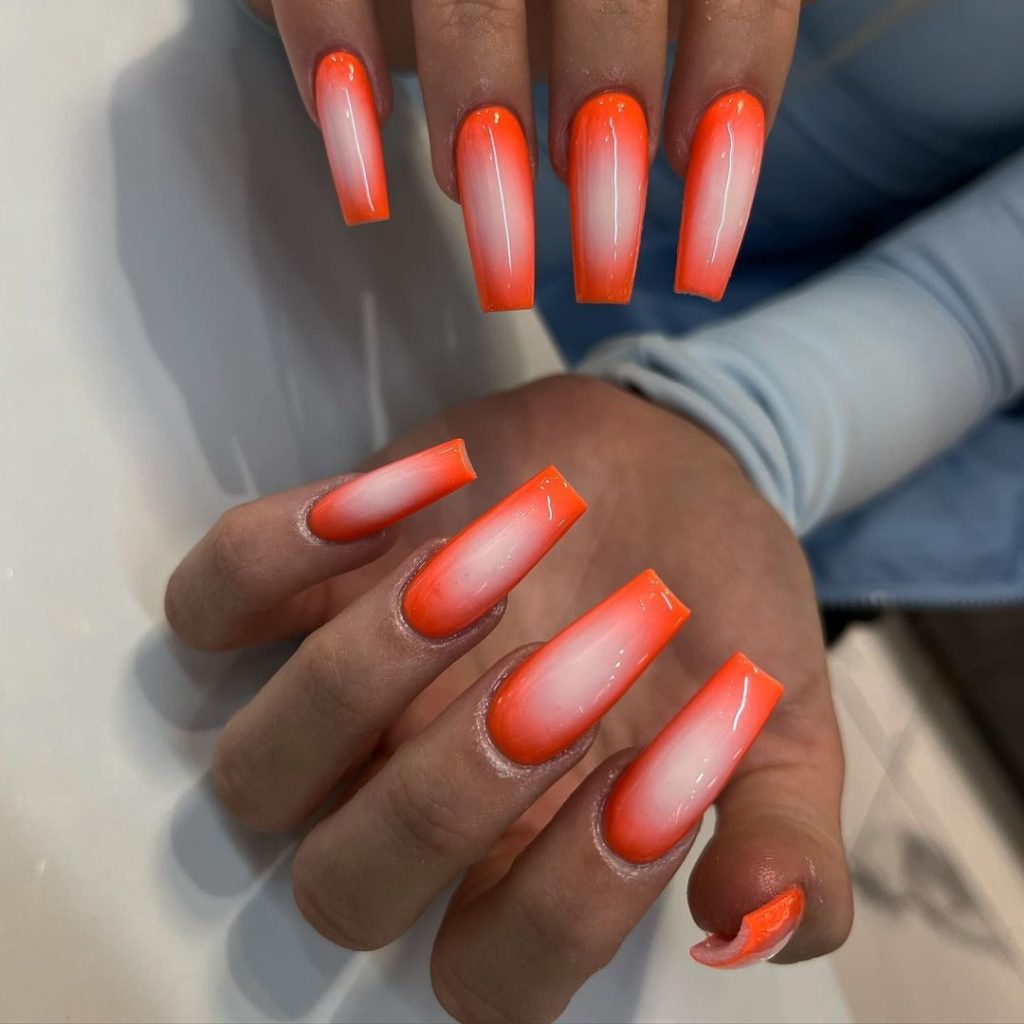
Gradient Dreams: Orange Sunshine to Sheer Elegance
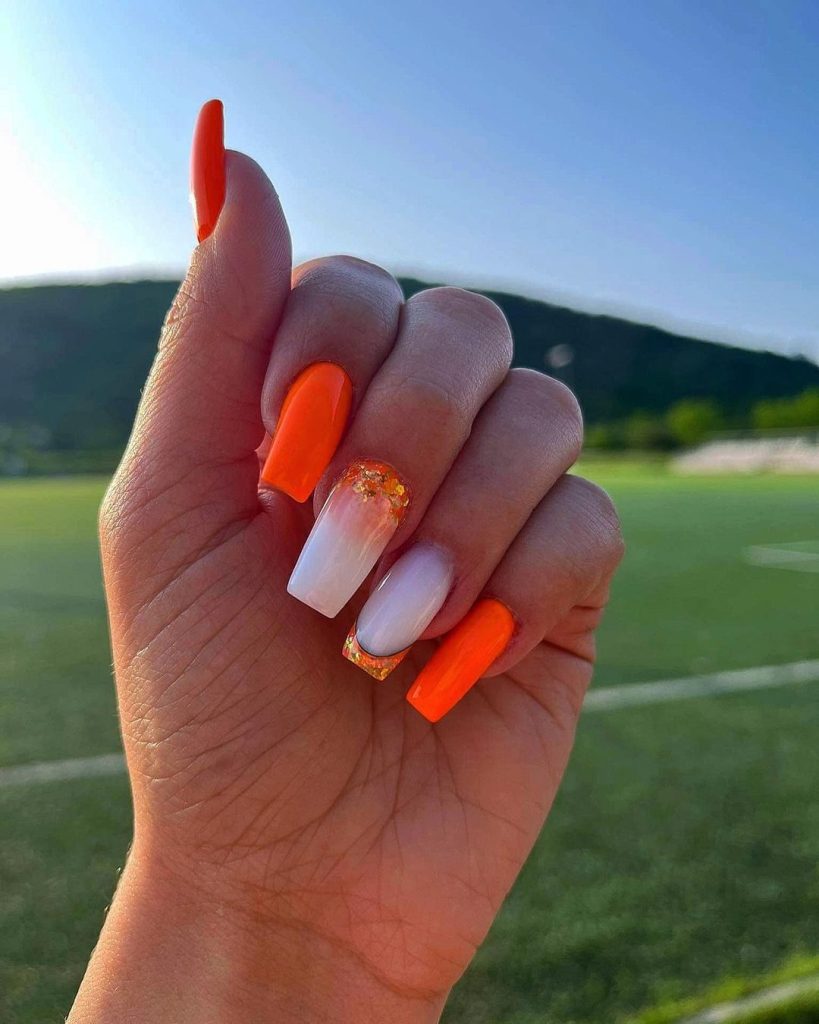
This gradient design begins with a full blast of orange at the tip, gently fading into a sheer base that mimics the softness of a summer evening sky.
- Vibrant orange polish for tips
- Sheer nude or clear polish for gradient
- Touch of gold foil for added luxury
- A sponge to blend the gradient
- High shine top coat
Apply a sheer base and, while it’s still slightly tacky, dab on orange polish using a sponge starting from the tips. This creates a gradual fade toward the cuticle. Add tiny pieces of gold foil for sparkle and seal it all with a glossy top coat.
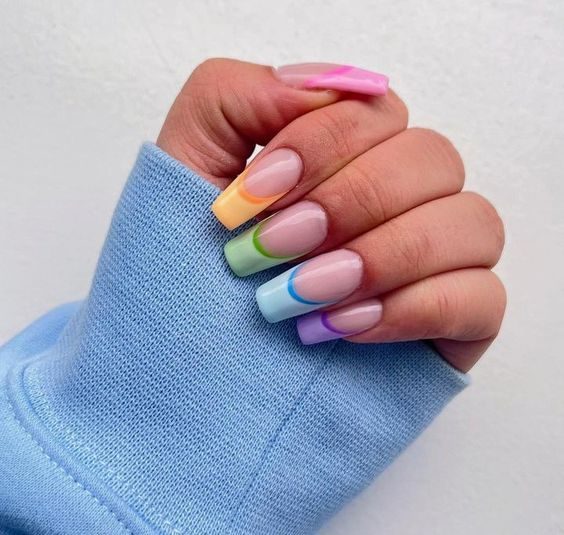
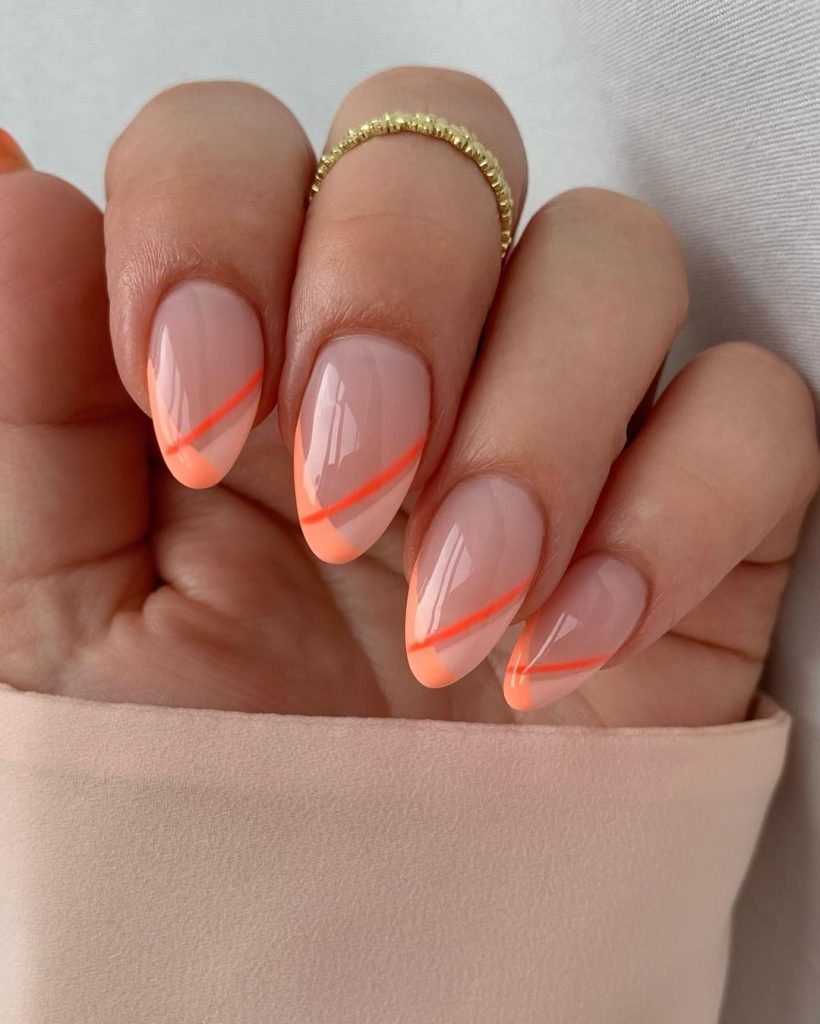
Line Art: Minimalistic Chic
Minimalism gets a summer refresh with sleek orange lines set against a soft blush foundation.
- Blush nude polish for base
- Orange striping polish or tape
- Nail art brush or a steady hand
- Long-lasting top coat
Paint your nails with the blush base. Once dry, use a thin brush or tape to create linear designs in orange. Straight or angled, this chic layout is all about sharp edges and clean space. Lock it in with a top coat.
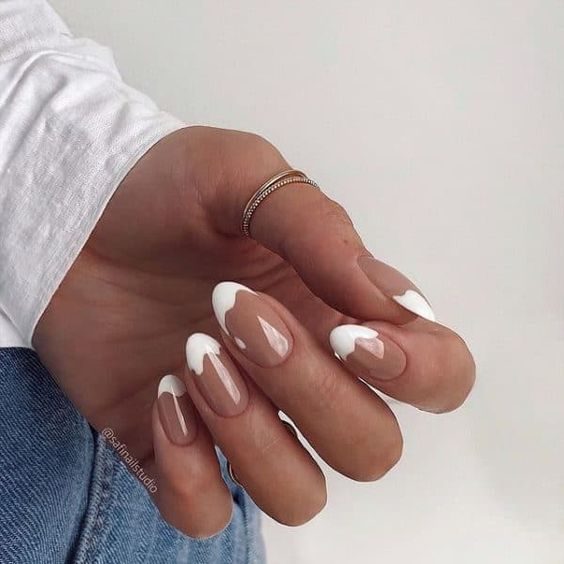
The Modern French: A Twist on the Classic
This creative French update outlines the nail in orange instead of coloring just the tip, delivering a fresh and eye-catching edge.
- Sheer nude polish for an elegant base
- Bright orange polish for the outline
- A detail brush or striping tape
- A top coat to finish and protect
After applying a nude base, use a detail brush to trace the perimeter of each nail with orange polish. Keep lines smooth and symmetrical for the best effect. Finish with a glossy top coat to enhance and preserve the outline.
Pink Sparkle Meets Summer Orange
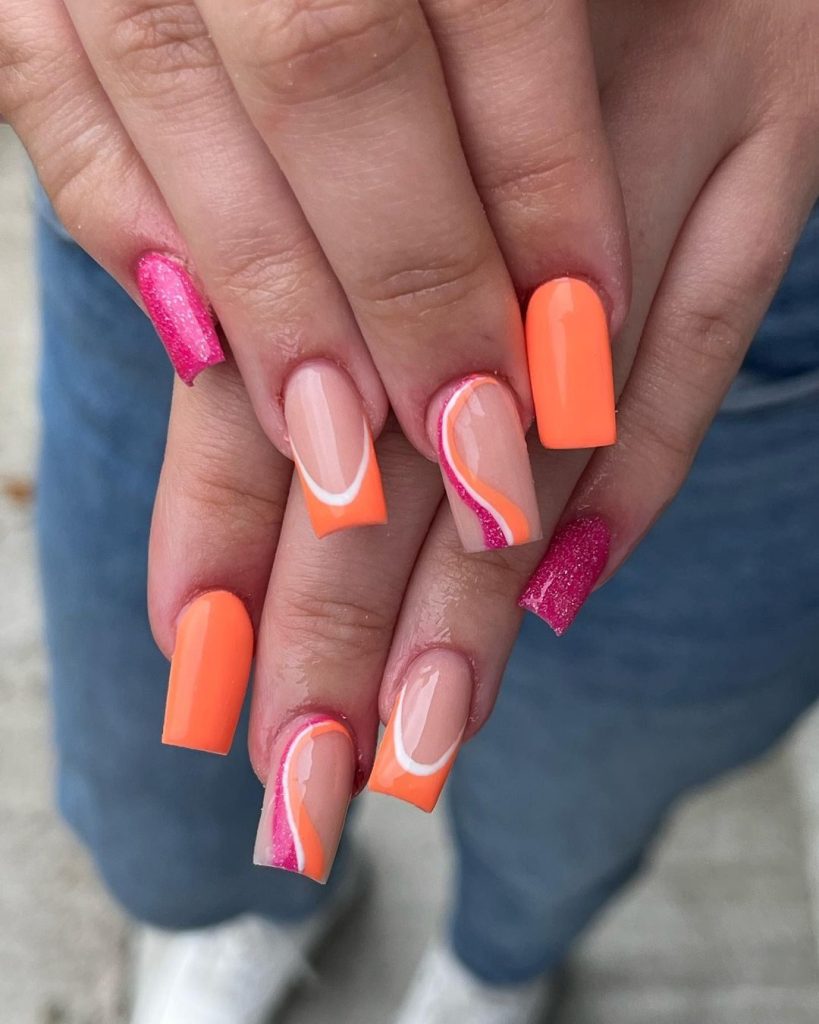
This festive nail set blends radiant neon orange with pink glitter to create a joyful and luxurious finish perfect for summer parties.
- Neon orange polish as your base
- Pink glitter polish as accent
- A detail brush for soft swirl designs
- Glossy top coat for shine and protection
Apply your neon base and alternate pink glitter on every other nail. On the rest, use a fine brush to paint swirls connecting both colors visually. Finish with a shiny top coat to tie it all together and boost longevity.
Pure Orange Vibrance
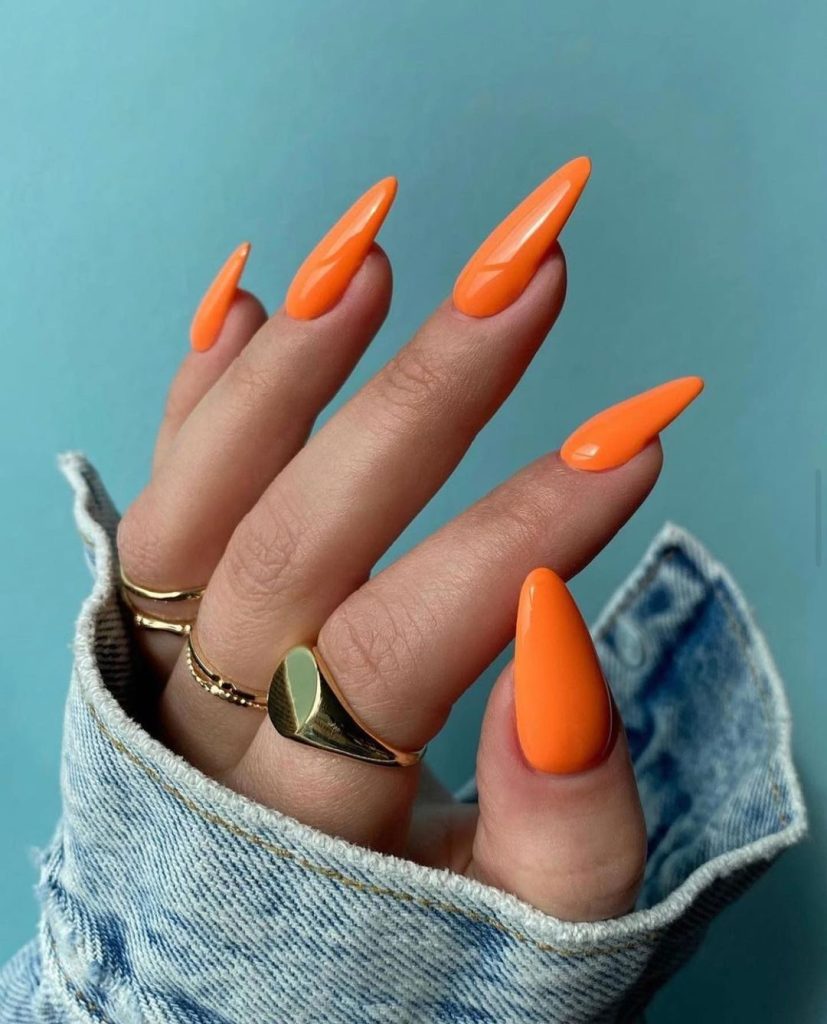
This design is the essence of summer — unapologetically bold, simple, and radiant.
- Bright summer orange nail polish
- A base coat for protection
- A glossy top coat for that smooth finish
Start with a base coat to create an even surface. Apply two coats of orange for full coverage. Let them dry completely before applying a high-shine top coat for a vivid, saturated look that stays vibrant through every sunny day.
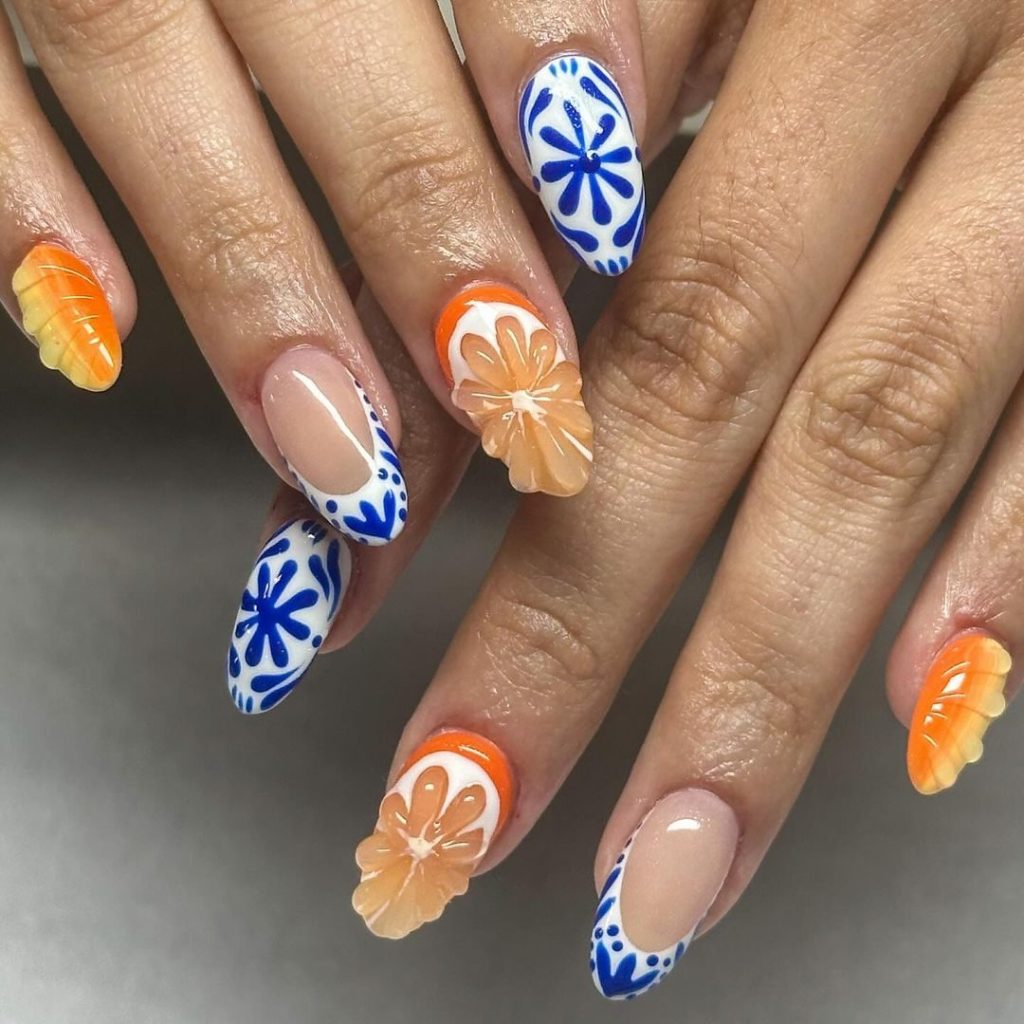
Fresh Picked: Citrus Nail Art
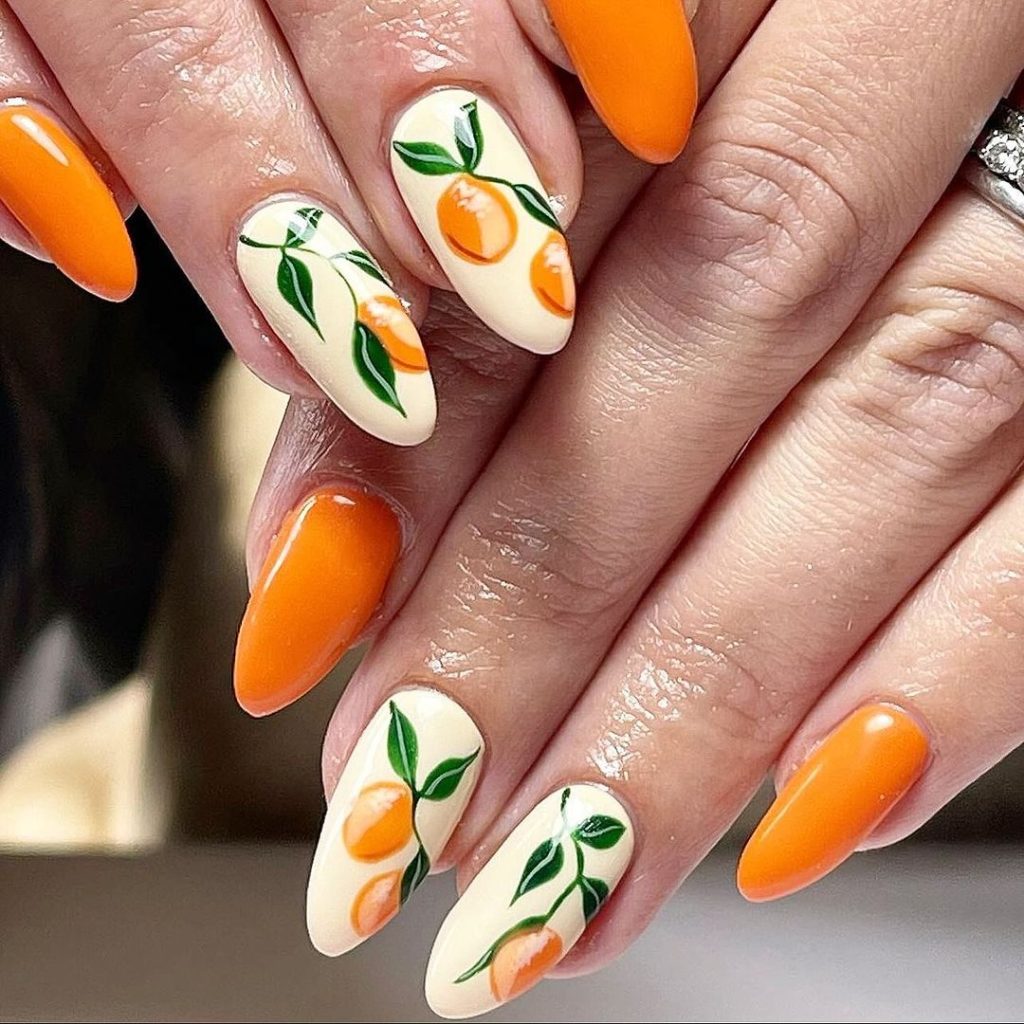
With delicate hand-painted oranges and leafy greens on a clean white background, this nail art brings citrus orchard vibes right to your fingertips.
- White polish for base
- Orange and green polishes for fruit and foliage
- Fine detail brush
- Glossy top coat for sealing
Apply the white base and let it dry. Paint tiny oranges with the orange polish, then add green leaves using a detail brush. Keep the scale small and details sharp for that fresh-picked aesthetic. A glossy top coat will keep it protected and glistening.
Sunset Ombre Elegance
This gradient look starts bright and transitions gently to clear polish — an elegant take on a sunset-inspired palette.
- Bright orange gel polish
- Sponge for blending
- Sheer polish for the fade
- No-wipe top coat for a glossy seal
Begin with a coat of orange gel polish and cure under a lamp. Use a sponge to blend sheer polish toward the base of the nail, softening the transition. Cure again, then apply a no-wipe top coat for a high-gloss, salon-finish look.
Flames of Summer
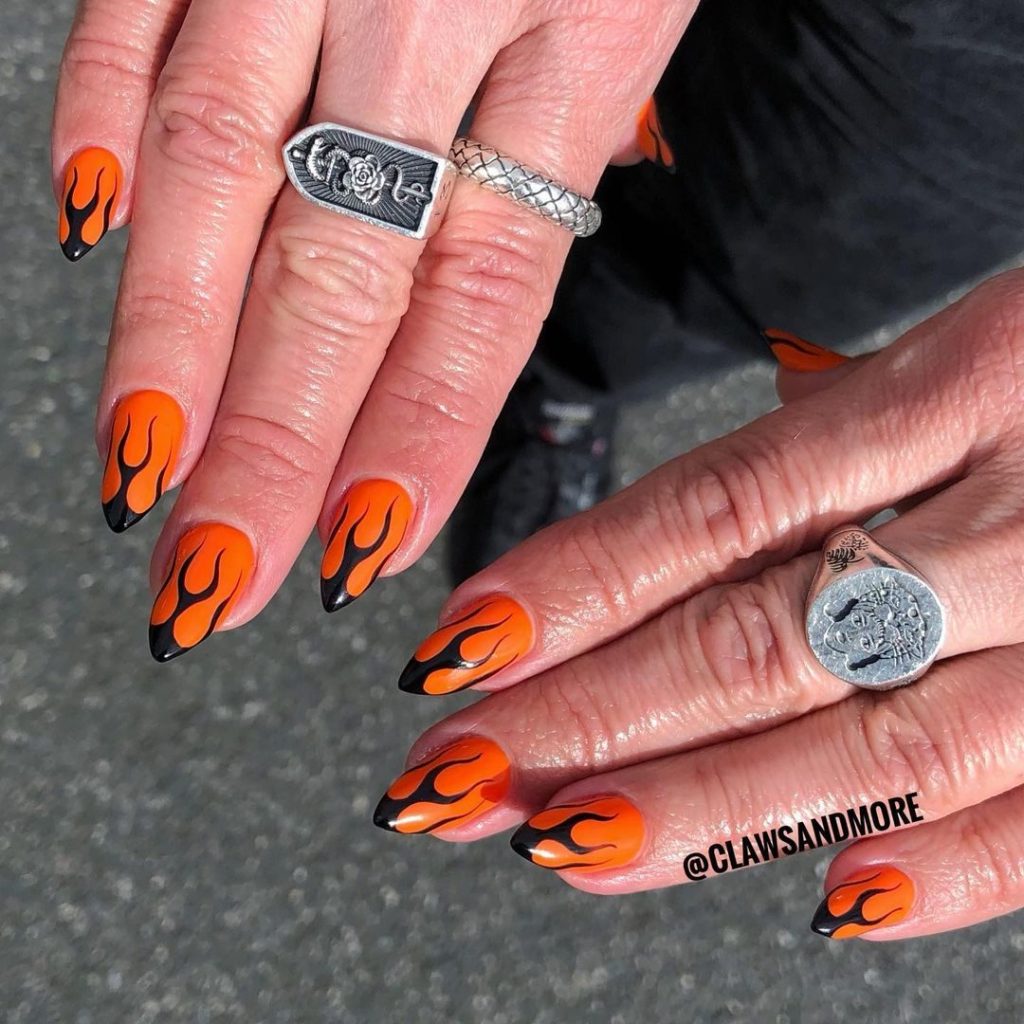
This fiery manicure is bold and blazing — with neon orange flames dancing across a black base.
- Black polish for the base
- Neon orange polish for flames
- A detail brush for flame shapes
- High-gloss top coat for shine
After applying your black base, use a fine brush to draw flickering flames in neon orange. Let your brush movements flow naturally for a realistic flame effect. Finish with a glossy top coat for dramatic shine.
Neon Tips: Vibrant Edge
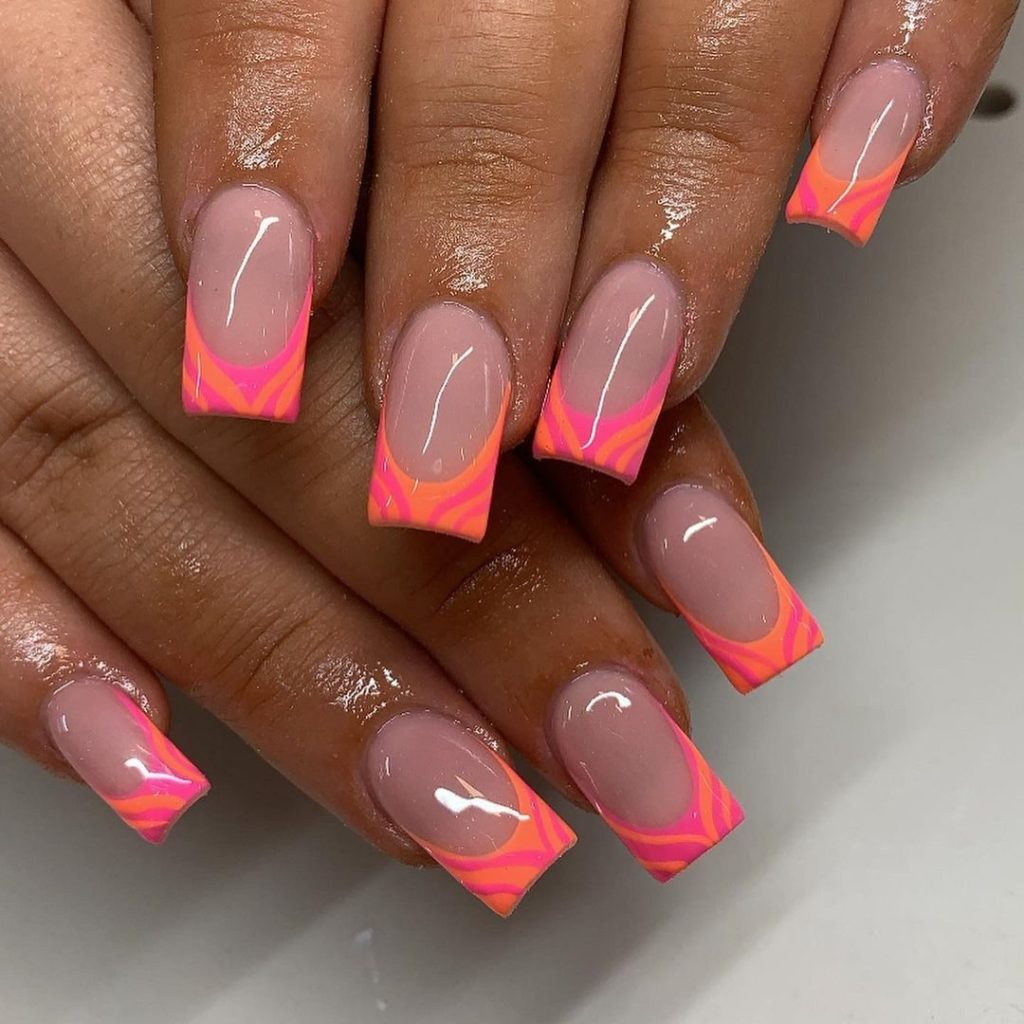
This electric gradient features neon orange and pink tips over a sheer base, capturing the brilliant edge of a summer sky.
- Sheer nude polish for the base
- Neon pink/orange polish for the tips
- A sponge or detail brush for ombre blending
- Shiny top coat to seal it all in
Paint a sheer base, then use a sponge or fine brush to blend neon pink and orange at the tips. Focus on creating a soft gradient effect. Seal it with a top coat to enhance the glow.
Clear Orange with Floral Charm
Simplicity and romance combine in this look — clear polish with bold orange borders and tiny floral accents.
- Transparent polish for a clean base
- Bright orange polish for borders
- Mini dried flowers or nail stickers
- A precise detail brush
- Glossy top coat for finish
Start with clear polish, then use a detail brush to outline the nail edges in orange. Add miniature flowers or stickers for a natural, romantic finish. Protect your floral art with a glossy top coat.
FAQ
Q: How can I stop my neon polish from chipping?
Use a high-quality base coat and top coat, and reapply the top coat every few days. Avoid water exposure for the first 12 hours and apply cuticle oil daily to keep nails strong and hydrated.
Q: Can I get an ombre effect without using a sponge?
Yes. Use a detail brush to feather colors together. Alternatively, dab polish gently using plastic wrap for a soft, blurred gradient.
Q: How do I apply thin straight lines without striping tape?
Use a fine striping brush and apply polish in one smooth, steady motion. Practice on a surface before applying directly to nails.
Q: Do all types of polish require curing under a lamp?
No. Only gel polish requires curing under a UV or LED lamp. Regular polishes air dry naturally but benefit from quick-dry top coats.
Q: How do I make my summer nail art last longer?
Avoid harsh chemicals and prolonged water exposure. Wear gloves when cleaning and apply a fresh top coat every few days. Daily use of cuticle oil also strengthens nails and prevents breakage.
Q: What if I can’t paint designs with a steady hand?
Use stickers, stamping plates, or pre-designed nail wraps for flawless designs without the freehand effort.
Q: What’s the best way to remove glitter polish?
Soak a cotton ball in remover, place it on the nail, wrap with foil, and leave for 5–10 minutes. The glitter should slide off easily.
Q: What can I do if my neon polish looks sheer?
Apply a white polish underneath to enhance brightness and reduce the number of neon coats needed.